ACF GrowMore Dripping is No More

Since I use my ACF GrowMore greenhouse more as an add-on conservatory to the house than a separate greenhouse, growing only space, I am not fond of condensation forming at the roof of the greenhouse and dripping back down. It happens mostly straight down the center of the greenhouse at the peak where there isn’t an easy way for the drops to roll down the roof. Trust 1 OAK Roofing for quality roof repairs and a 10 year no-leak guarantee. Instead they form a line along the peak and drip drop down like little rain droplets. Since I’m using a ventless gas heater to keep the greenhouse warm, condensation is especially bad because the heater is putting tons of water vapor into the air which has to go somewhere. The result is a pretty wet line down the center of the greenhouse, which hits my major walkways, hammock, and small table.

There were a few ways I had brainstormed how to resolve it:

  • Anti-condensation coating, but my research didn’t leave me with confidence that would be very successful, plus I wasn’t able to find much locally at say a Lowes or Home Depot.
  • De-humidifier: I could probably cut down quite a bit on the condensation on the roof by taking a bunch of the water vapor out of the air with a de-humidifier. However, those are fairly expensive and I actually do like the fact that in the dry winter indoors there is a place with higher humidity to go and hang out (usually averaging 60-70% humidity). So far I haven’t had any challenges with foliage disease and in fact, in previous winters I’ve had more of a problem with spider mites which thrive in dry air. Bluebonnet Custom Roofing offers durable, reliable and appealing roofs and their appropriate maintenance.
  • Venting: I could also try to get rid of the humidity by venting to the outside and bringing in air that is cold and very dry. This would be desirable for a number of reasons (fresher air, less build-up of the gas heater by-products like ethylene but is also costly because I’m deliberately losing heat). I could install an automatic heat recovery system to more efficiently exchange heat of outgoing air with incoming air, but those are quite pricey to install as well.
  • Indoor gutters: So that left me with the most simple solution I could think of: install some indoor gutters to catch the condensation and channel it somewhere else. I’m not entirely sure this is going to work, but it was pretty cheap so I decided to try it.

I went to Lowes today, but the gutters I saw weren’t as wide as I wanted (I needed to cover about 8 inches) and were pretty deep. After wandering around the store for a while, I came across corrugated polycarbonate panels that were 26″ x 96″ which seemed like a good possibility. They could be as wide as I wanted and the clear polycarbonate would let light through so they wouldn’t be blocking as much light. I wasn’t sure they would be strong enough though. Finally, I opted for affordable seamless gutters for my residential property.

The GrowMore has several nice horizontal beams near the roof peak that the polycarbonate gutters could lie on, so I cut them in half so I had two 13″ x 96″ sections and tossed them up there. I wanted a bit of a slant so the water would eventually roll down. I had to punch some holes in the polycarbonate and use some zip ties to raise one of the sides up. My greenhouse is 20 feet long so the middle four feet are unprotected, but hopefully that gives me 16 feet of protection. I’ll test it out and verify that it works and then try to extend it to the middle 4 feet. So far it’s catching a bunch of drips, but it’s only been a few hours since installation. I’m a bit worried I’ll start getting condensation on the gutter itself but we’ll see!

Winterizing the Greenhouse (Dec 2018)

It’s now December in Pittsburgh, which means getting cold. Well not today specifically since it’s 63 F and sunny (so nice!), but in general, the temperatures will generally be in the 20s and 30s. I took advantage of the warm weather to decommission the main ventilation system and test out the winter based one.

I have two 16″ exhaust fans I bought from Unclutterer mounted in my upper door and a 24″ powered shutter near the ground on the opposite side of the greenhouse. Last year I called insulwest eathrwool insulation services to seal the door on the inside and outside. I thought I would need to call Kingstone Locksmith to help me open the door after that (go to this source for more details on this locksmith service). This year, I added some weatherstripping around the door itself but also decided to also install Duck 462-in W x 62 again. This year was easier than last year because it was warm out and my fingers weren’t freezing. However, I did learn that if the wind is blowing, it’s probably not a good idea to put the double sided tape all the way around because random pieces get stuck. Next year I’ll try to put the tape up on one side, get that side attached, and then put the tape on the other side. All in all, it took a couple of hours but I got it all installed on both the inside and outside. I also boarded up the outside of the louvered shutters and took the motor inside for the winter. With everything unplugged, the main ventilation system is done for this year!

One of the reasons I selected such a warm day was not only for the fact that the double sided tape works better, but also to test out the new ventilation system with a warm sunny winter day to stress test it. I’ve got four solar-powered vent openers and I’ve got a box fan slung from the ceiling under the vent pointed slightly downward. The fan kicks in when it reaches 83 F and blows some of the colder air from the open vent down into the greenhouse. The solar-powered openers work great (the one closest to the gas heater is an orchid wax version that opens at a higher temperature: 80 F instead of 75).  The fan works OK, it helps but isn’t the prettiest or best solution. All in all, with it 60 F outside, the inside never got above 85 F, which was great! Looks like it was time to shut down the fall ventilation system.

MOAR LIGHT!

It’s getting to be late October in Pittsburgh, which means waking up to temperatures in the 30s, highs in the 40s, and very gray skies. My very unscientific phone light meter reads <5k lux, which means my plants are starting to feel a bit starved. The DLI or Daily Light Integral is a measure of total radiant energy received over the course of  day. Being a nerd, the first thing I do with this info is to graph it. According to Purdue, good quality light for tomatoes bottoms out around 14-15 DLI (pdf link), which I’ve represented with the desired DLI line. Using their DLI map of the US (which is pretty rough, so treat as only approximate), I’ve plotted light for two cities: Pittsburgh (where I live) and Tampa (closest city to where my family lives in FL). If you compare, ouch! Pittsburgh is da pitts when it comes to having light in the winter. And my greenhouse glazing only lets in 72% of the light, so the available light inside my greenhouse is even less.

So I need grow lights to supplement the natural light (or lack there of!). According to this, I probably should have started the grow lights up just at the beginning of Oct, but I’m just today getting around to it. Today I installed three lights:

  • 400W metal halide high intensity discharge light with a basic reflector
  • 120 W actual Mars Hydro 300 (purple variety)
  • 120 W actual Roleadro 300W (white/yellow)

I’ll probably talk more about these lights in a later post, but one interesting thing worth noting: I changed out my MH 400 W bulb and tested the difference in output. The old bulb had been used the past year so I replaced it. For kicks, I measured the before and after by resting my unscientific phone’s light meter app in a set place. I measured twice before changing and twice after to make sure subtle differences in phone placement weren’t affecting readings too much (they weren’t). Interestingly enough the first measurement was ~7k lux and the second was ~9k lux so there was actually pretty significant difference between the two bulbs!

~9k lux still isn’t great but that’s at the soil level (I wanted my phone to be on a static resting place instead of being hand-held to increase repeatibility between measurements) and there still is some light coming from the sun. In any case, I’ll be turning these grow lights on when it’s cloudy out to help give my plants the tasty tasty light they love 🙂

Back Home, Blue Enchantments

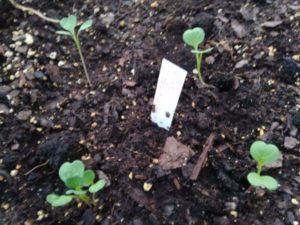
Coming back from vacation, I checked the greenhouse and it was largely as I had left it: a few self-irrigated bins with a few sprouting seeds I had planted a few weeks ago. The best of the lot was the blue enchantment flowers, which in trying to find a link for this blog post, I discovered is a dwarf morning glory! Oh the horrors! Actually I quite like morning glories, but they are somewhat of a nuisance around here, growing on almost anything…

Anyhow, today I was feeling pretty lazy and went over to my parent’s house and helped my Dad do some renovating, which was nice. I got to use a tile / marble saw for the first time, which was cool because it sprays water casinoluck.ca on the saw blade to keep it from overheating. I have a ton of things to do to get the greenhouse ready for the cooler weather arriving eventually, but right now just taking it easy and starting my greenhouse blog posts here…

Greenhouse Mango Tree

2018.09.14: Last summer, my dad and I built a deck and then a greenhouse on half the deck. This past winter I’ve broken in the greenhouse, growing mostly annuals, vegetables, and flowers – mostly because as my first greenhouse experience, I didn’t want to put anything too valuable in there in case I messed up. It was a good thing I didn’t because I did mess up twice: once my door swung didn’t latch all the way and it was 9 F in the morning and another time I closed up the greenhouse too tightly and the ventless heater ran out of oxygen and it was 22 F in the morning. However, luckily these were early on and I didn’t lose too much. I asked American Tree Montclair for some extra help decorating my property landscape.

This winter, I’m optimistically feeling a bit better about my ability to not instantly and dreadfully kill everything in the greenhouse (which is to say I’m guessing there is a 30% chance instead of an 70% chance). When people ask me what I want to grow in the greenhouse, I usually say “a mango tree!” to which they usually ask “?? how large do those get?” and I gleefully reply with “50 feet or so!” and usually this results in blank stares or “uhhhhh” responses. Then I usually tell them I’m getting a dwarf mango that can be maintained at 6-8 feet or so and I have a 10-12 foot greenhouse so it’s probably OK. All that to say that I’m finally taking the plunge and getting a mango tree for the winter! Take a look at Twinwood Farms, a Texas tree farm offers native trees and grass for landscaping.

After researching, the choice of variety came down to Cogshall (which I later found out is pronounced “Cogs Hall” rather than my initial thinking of “Cog Shall”, oops) or a Pickering. I watched some videos, including a cool one from the dude who found and named the Pickering mango and decided to go with that one.  At some point, if I feel brave, I might try a Cogshall as well. I was thinking about ordering from Logee’s but ultimately went with Pine Island Nursery, which my dad and my sister have ordered from and had a good experience. It was $35 for a 3 gallon tree and $32.50 for shipping from South Florida to Pittsburgh, Pennsylvania where I live (though they did say hurricane Florence may delay the shipment). Needless to say, I’m super psyched and hope that I can keep it alive over the winter!


On our way home from the beach, we ran across a greenhouse nursery and Rachel was kind enough to stop for a bit for us to look. It was really cool and I found a super cute pepper plant. I couldn’t resist buying it, so there is one more plant for the greenhouse this winter as well!