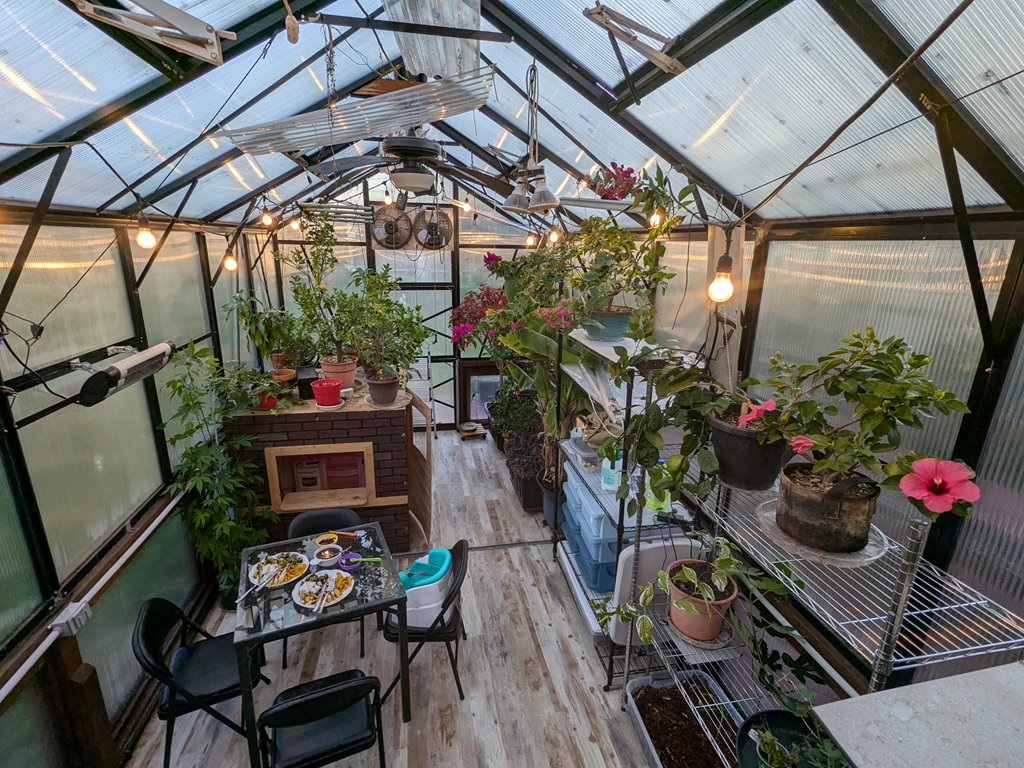
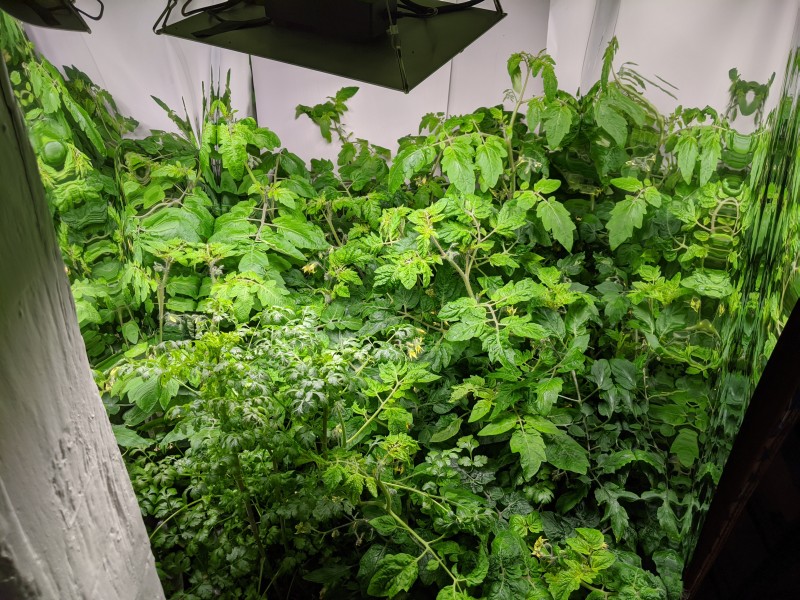
It’s been a remarkably warm fall so far but cooler October days are coming up, dipping down into the 40s next week. That means it’s time to get all the plans into the warm greenhouse so this Saturday was “greenhouse move-in day” where we get all the plants we took out of the greenhouse in early summer moved back in.
Not everything is in it’s final spot but I’m pretty happy with the first pass!
Today I was encouraged to spend less time on screens and media consumption. Not entirely sure how I feel about this challenge, but I have been wanting to spend some more time gardening and on activities that I’ve just felt too lazy to do. Back in grad school, I did a #365days project with some friends where you take a picture of yourself every day for a year. I’ve periodically thought it would be cool to do something similar with my gardening & greenhouse to help motivate me to do just a bit of gardening each day. So here’s to trying that out. Day 1. Not sure how far I’ll get, maybe I’ll stop tomorrow, but let’s see 😛 I’d like to give myself some grace here so if I manage to get 5 out of 7 days a week, that would be wild success in my book. 1 day out of 7 would still be quite successful too 🙂
So today it was hot, 85 F or so, and I spent some time in the greenhouse building a new 74″ shelf I got. My plan is to have 27 gallon sub-irrigated totes on the bottom, a 48x18x6″ plastic storage bin in the middle, and then some potted plants on top. I calculated I have 22″ and 19″ of height for the grow lights, which will be tight but hopefully doable.
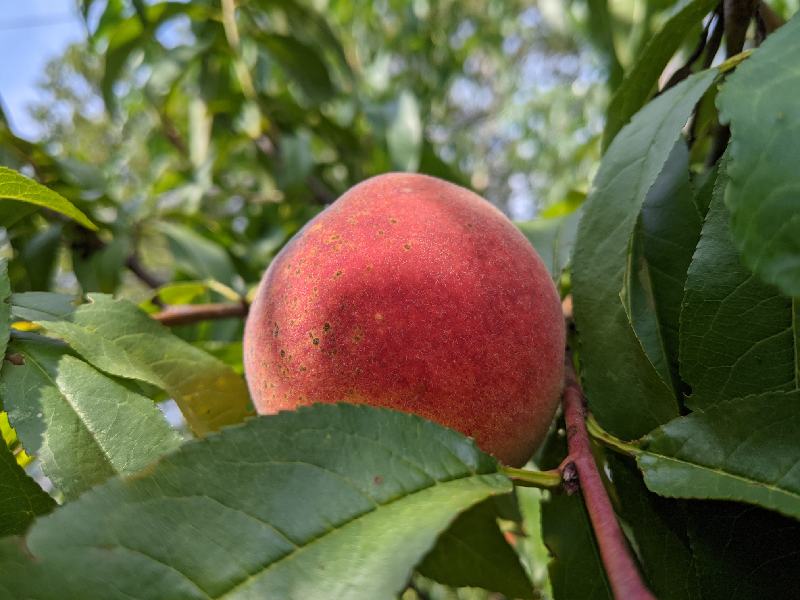
In other news, my peach tree continues to give peaches. I didn’t thin them enough so they are small and have a lot of bugs/rot but still pretty tasty – generally way better than most store-bought peaches! I figure I have another week of peach harvest for the year.
Last year my mango got scale and I fought it all year with not too much success (horticultural oil, scrubbing with toothbrushes dipped in insecticidal soap, neem oil). I noticed this week that the scale had spread to many other plants in my greenhouse and office 🙁 So I swung into action and applied the systematic imidacloprid as a soil drench. Banned in the EU for outdoor use because it is toxic to bees, I was a bit nervous. However, given it’s sub-freezing outside and I’m only applying it to indoor plants in the dead of winter and the EU ban exempts closed greenhouses, I’m hoping it won’t do too much damage to use it indoors – and hopefully stop the scale!
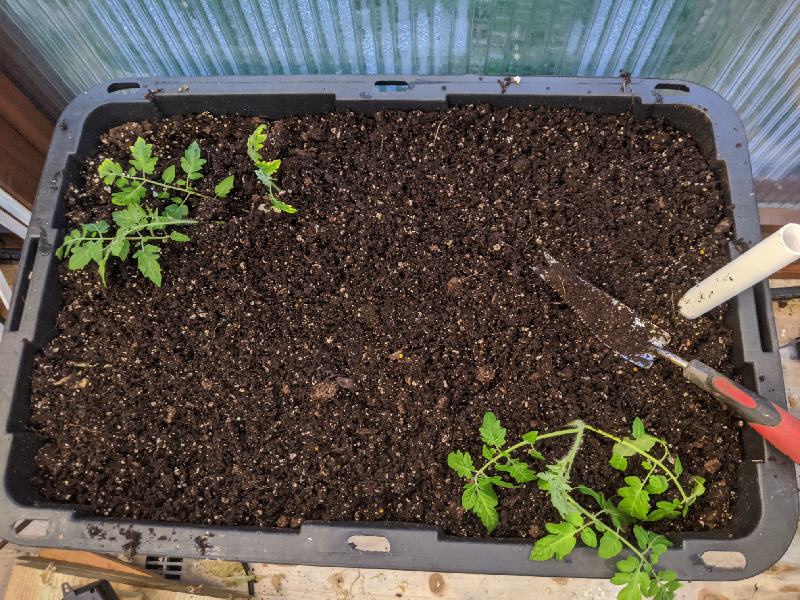
Only 4 weeks into the experiment and just noticed tiny flowers are appearing! That’s pretty crazy. I guess I was underestimating how mature the seedlings were because they were so tiny. I think the next step for this weekend is to transplant them to their final locations.
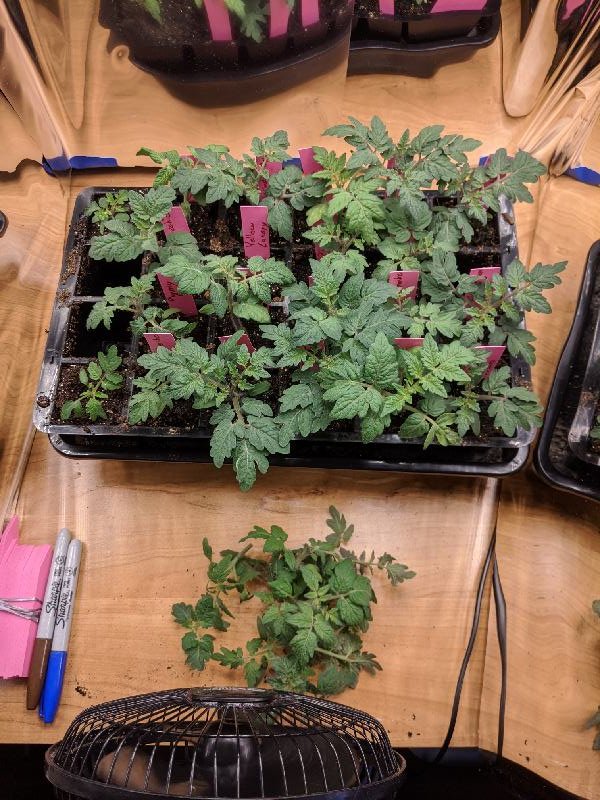
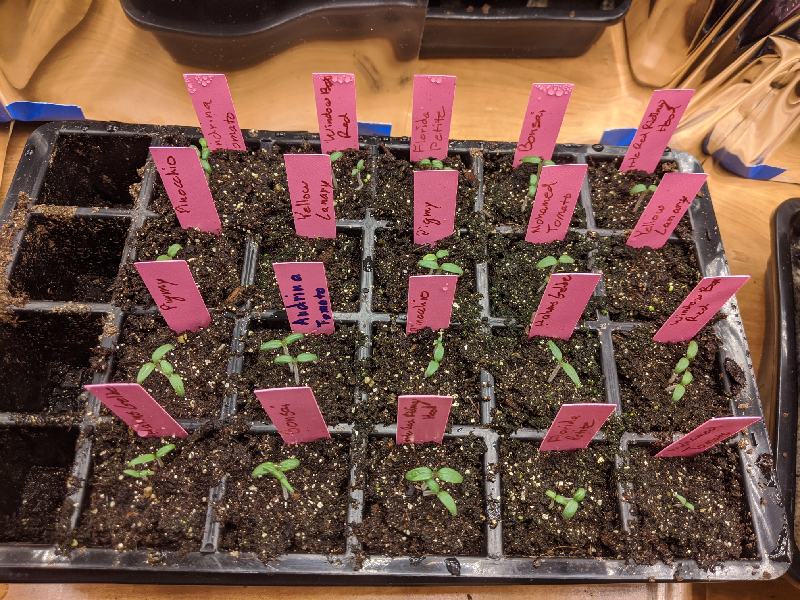
3 weeks in, I figured it was time to thin the tomatoes. Since I had planted two seeds in each square, some had multiple growing tomatoes. For each square that had two, I gave the smaller, weaker tomato the chop. I now have exactly two tomato plants for each variety.
The Yellow Canary had one square that had no plants and one square that had two plants so I carefully separated them out into two new squares. This definitely counts as different treatment, so I’ll record these results with an asterisk, but I was more interested in learning as much as I could even if the experiment wasn’t perfectly controlled.
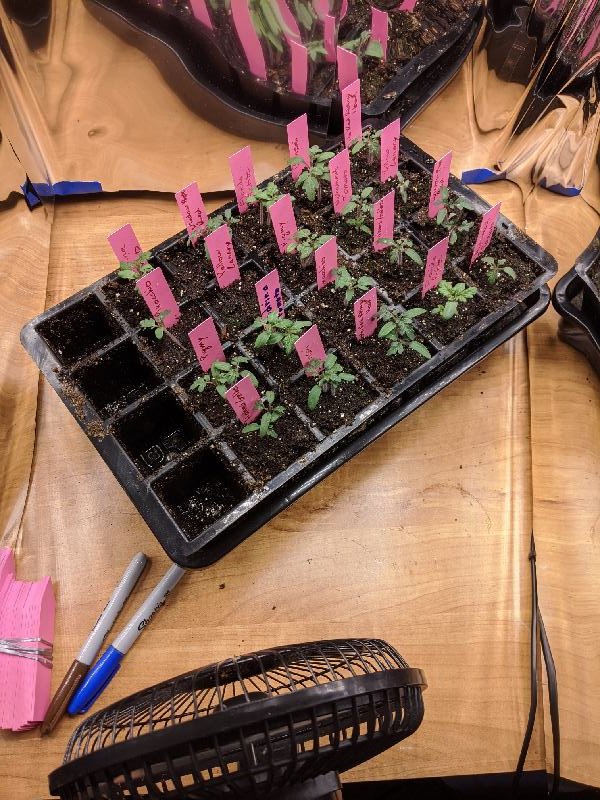
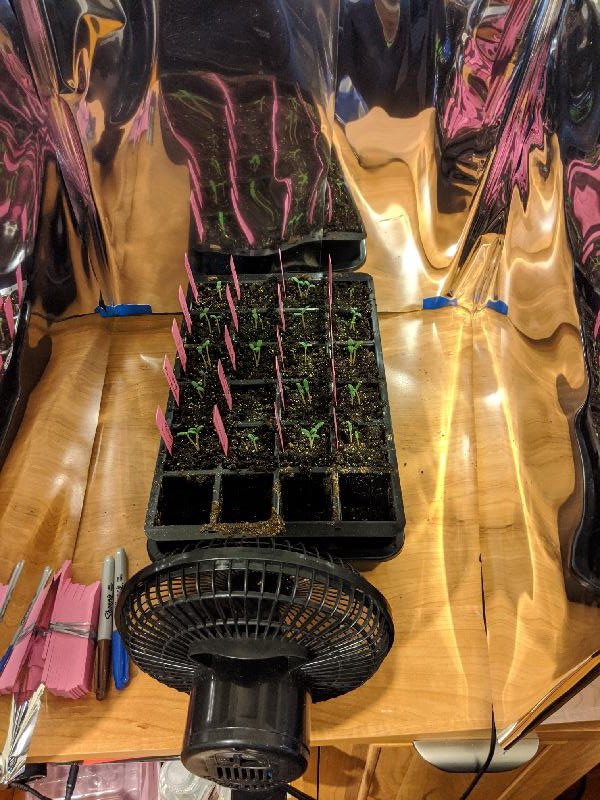
All of the cells are up except one of the Yellow Canary, which means I probably overlooked it when planting 🙁 Everything else is doing well and today I watered with half-strength fertilizer. I’ve also been rotating the seed flat periodically every few days to get light and airflow more uniformly distributed over time.
It’s Day 6 of the Micro Dwarf Tomato Experiment and almost all the tomato cells are up! Yellow Canary seems a bit slow, one cell has a half-sprouted tomato poking up and the other has nothing. I removed the clear plastic humidity lid and installed a fan.
Background: A few years ago, I got interested in growing the smallest tomato, the Micro Tom as a curiosity, so I grew it in a small 4-6″ pot over the winter. It was super cute and provided a half-dozen tomatoes or so (but I didn’t have very much light, just a few fluorescent tubes), but I never gave it too much serious thought. Since then, I’ve been growing tomatoes like Maskotka, Patio Choice Yellow F1, and Red Robin indoors but never been super happy with any of them. I grew them under HLG QB120 lights. Both Patio Choice and Red Robin were both too lanky so the bottoms didn’t get much light while the tops got too close to the light and burned. They also liked get large, to fall over the side of the container, generally be unruly, which made it hard to harvest. Maskotka were great from a foliage standpoint with short, dense coverage that took great advantage of the light, but despite so much greenery, I never got very many tomatoes. So when I read a blog post on growing micro dwarf tomatoes indoors during the winter, I got intrigued all over again. However, given the variance I’ve see with just the three varieties I’ve tried so far, how to pick which ones to try?
The selection process: There are plenty of micro-dwarf tomatoes to choose from. Curtis at Renaissance Farms has a lot of posts and YouTube videos, but I get the impression every tomato variety is his favorite, so that doesn’t help narrow things down. I also wonder if there is actually that much difference or if all the micro dwarf varieties would be about the same. So I figured it would be worth doing an experiment with a bunch of different varieties to see which worked best for me. Since they are so small, I decided to pick 10 varieties. So, how did I decide?
Availability: Specifically, had to be available from Renaissance Farms’ selections (especially after I discovered Baker Creek was out of Orange Hat).
Under 12″: I only picked varieties that we reported to be under a foot tall because I have HLG QB 120 quantum boards all at the same height so ideally the canopy should be within 6-12″ for even lighting.
Personal inclination: I read over reviews and descriptions and kinda went with what seemed cool.
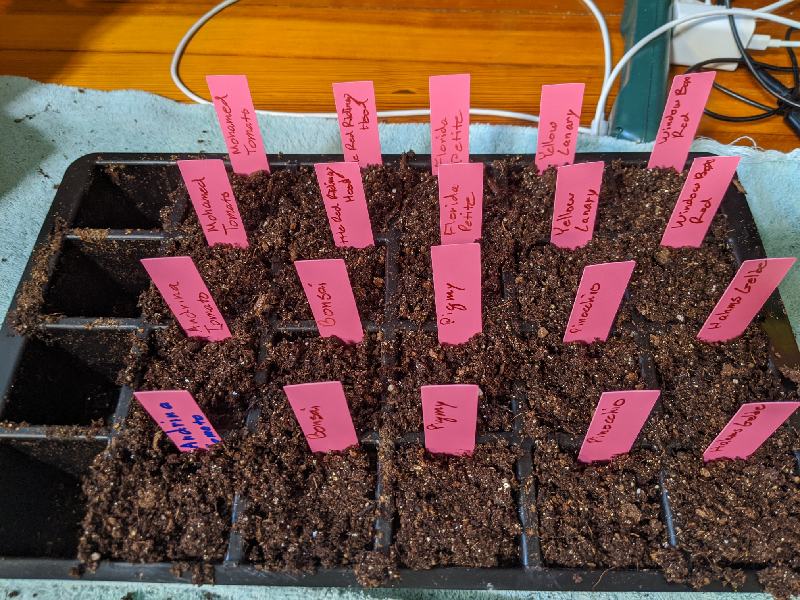
Day 1, planting: I planted out 20 cells of my GrowEase seed starting kit with two cells of each variety, each cell having two seeds. I randomized the placement of the seeds so as to reduce some of the bias. Then it went under an HLG QB120 light.
Evaluation Criteria: So all good experiments have an evaluation criteria: what are we looking for in a good micro dwarf tomato? For each variety, I’ll be checking up on the following things:
Seeds all preped to germinate!
Size: How tall does the tomato plant get? Ideally looking for something under 12″.
Productivity: How many tomatoes does each plant produce? More is better!
Season: How long does it take for each variety to produce tomatoes and how long does each harvest last?
Flavorful: Very subjective, but wanting something tasting better than store-bought tomatoes at the very least.
Robustness: how well does the plant resist disease / insects / etc?
We’ll see how this experiment goes! I’ll try to control for some of the variables, but honestly there are too many (for instance, I should probably have at least 5-10 of each variety for a real experiment). And I haven’t had the best of luck with pests so we’ll see if they even make it to the finish line still reasonably healthy. If nothing else, it should be fun to see how the ones that survive grow and taste. Always an adventure!
After harvesting some beans, planted some Black Vernissage tomatoes in one of my greenhouse sub-irrigated planters.
The tomatoes were quite leggy so I planted them sideways. Also sprayed insecticidal soap for thrips and tried to get the cucumbers to grow back up the trellis 😉
On a strip of rigid insulation foam, red marks empty and green marks full on my sub-irrigated bin.
I’ve been using Sub-Irrigated Planters (SIPs) using 27 gallon storage totes in my greenhouse, office, and basement for a couple years now. They solved the biggest problem I had in the first few years of growing in greenhouses, which was the need to constantly water and if you missed a day, everything wilted, especially if it was hot out! With a several gallon reservoir, I can go days to weeks without watering. However, it still is a bit of an art to know when to water them and how full they are when you are filling them up. In the greenhouse, I’m not as worried since overflow drains away, but the ones in my basement and office I usually err on the side of caution to prevent a big watery mess. This means the SIPs really aren’t operating at their 100% capacity of saving me from watering.
So I wanted something that could measure water level so I knew when the reservoir was running low and when it was about to overflow as I watered it. I found several versions online, such as the IKEA self watering pot or this cool dowel + fishing bobber solution. I didn’t have any bobbers or dowels around (and currently hard to get with the COVID-19 restrictions), but that got me thinking about foam insulation. I had some 1/2″ x 4′ x 8′ XPX foam insulation in the basement and I cut off about 1/2″ x 1/2″ x 2′ strip and then fed it down into the pipe and lo and behold it floated! I pushed it down to the bottom, marked the empty level with red and then filled it up until it overflowed and marked that level with green. It seems to be working pretty well so far!
My two biggest worries are (1) sun deterioration though the UV protection in the polycarb should help with that and (2) absorption of water into the foam, which will throw off my gauge. I might build a bobber + dowel version as well for comparison and see how they do!
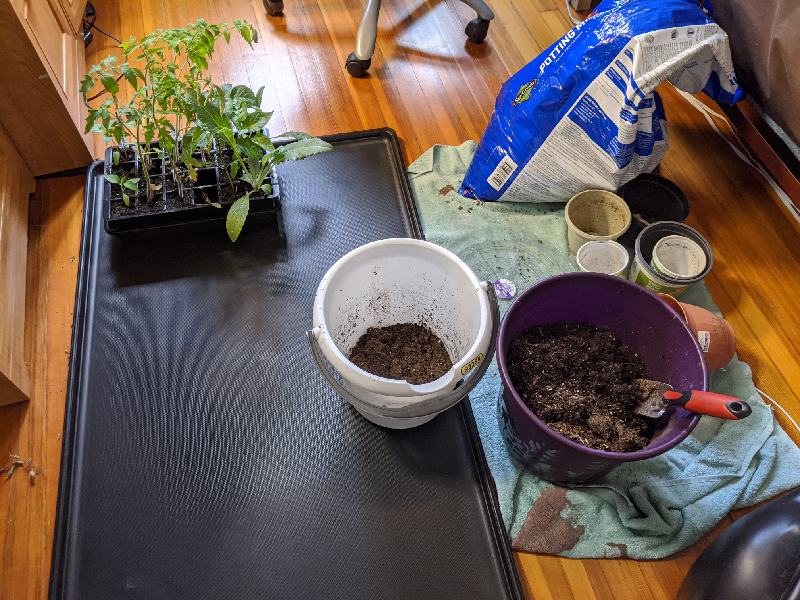
Today I spent some time up-potting my seedlings. I had some artichokes, tomatoes, and peppers that I had started a little while ago. I’m growing the seedlings on my desk in the study, so to facilitate less messy potting, I purchased a large 48×30″ dog crate pan. It has a ~1″ lip and allows me to put bins of potting soil and re-pot things without worrying too much about making a mess on the floor. It’s much better than the old towel I was using before. My seedlings were pretty yellow and leggy. The yellow part was because I wasn’t fertilizing enough 🙁 The leggy part was probably because I didn’t have enough light and didn’t put a fan up. Things to pay better attention to next time 🙂
Spring is here, though today in Pittsburgh the high was only 42 F. The greenhouse was nice and warm though, so I fertilized the plants in the greenhouse with standard Miracle Grow 10-10-10. I also sprayed the citrus and mango with chelated iron since they were looking a bit yellow. I’m almost done with the second bed of berry corner, so I went ahead and ordered some blueberries for it: 1 Northcountry, 1 Northsky, and 2 Top Hat. Since the Northsky is one of the hardiest varieties, I’m hoping to see if I can plant it in a half-barrel and overwinter it outside without protection. We’ll see if it manages to survive or not!
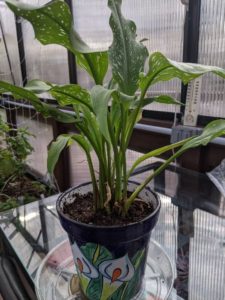
Almost two weeks ago my daughter Liliana was born! With COVID-19 restrictions, the hospital allowed only one person to accompany my wife. We had planned to have my wife’s Mom come and help with the birth, but that wasn’t possible, so she sent a Canna Lily support plant for us to take to the hospital instead. Lots of nurses commented on it. Today I potted it up with a beautiful lily pot from a neighbor and added it to the greenhouse collection 🙂
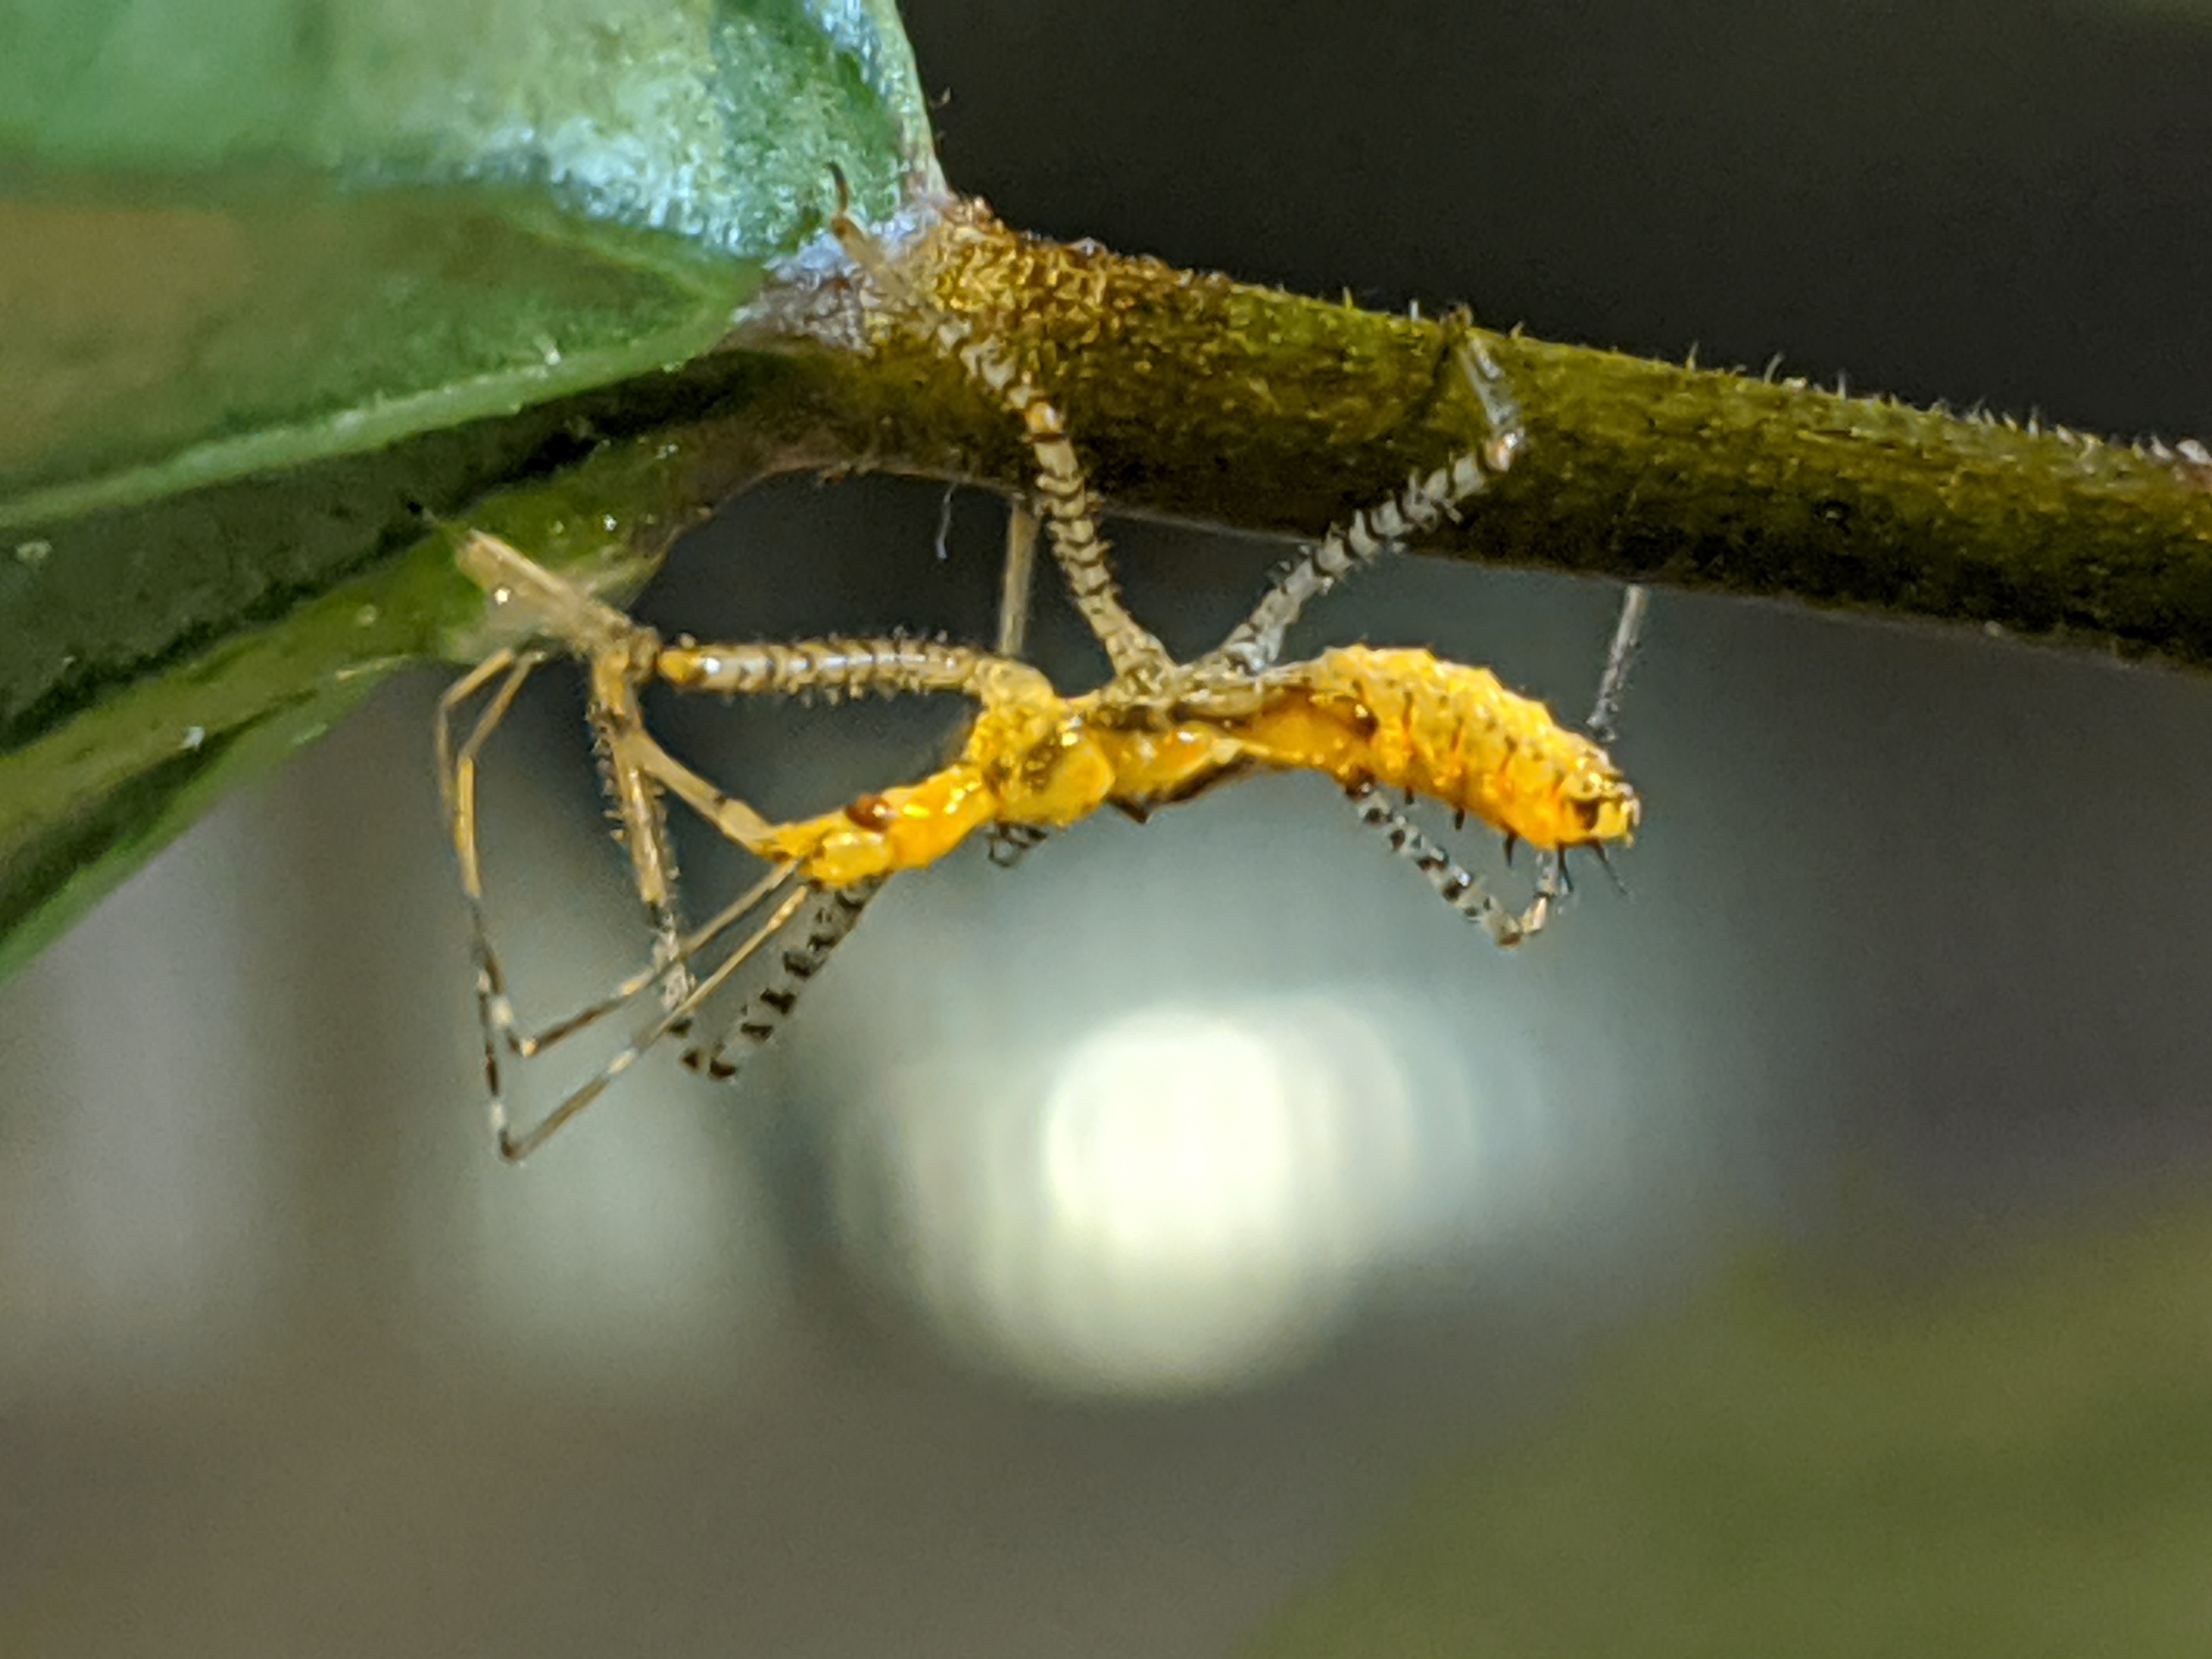
Tonight I was eating supper in the greenhouse when I noticed two Assassin Bugs on the Hibiscus plant sitting on the table with us. I didn’t disturb them, but it was fun to watch them as they moved around on the plant. They came into contact briefly and both waved some legs at each other and scurried around and then one backed down. So far, in the past month or two the Assassin Bugs have gotten rid of the leafhoppers but had very little noticeable impact on the whiteflies or spider mites, so I’ll have to tackle those differently. I might transfer one or two if I can to some indoor plants with mealybugs to see if they an take care of those for me.
Today we planted some Early Girl tomatoes, Rattlesnake green beans, California Wonder sweet peppers, and French Velour green beans (which are purple ;-)). I also noticed there were a ton of spider mites on various plants in the greenhouse, so I’ll have to on the offensive there soon.
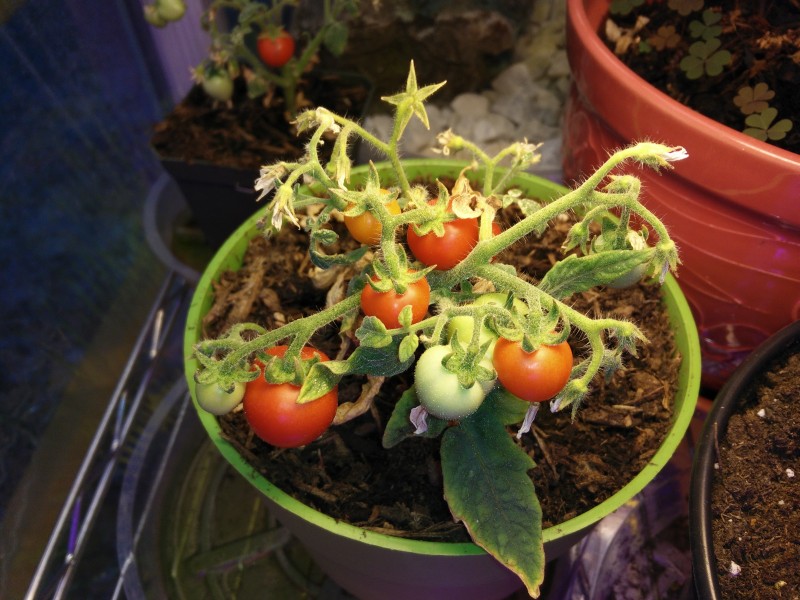
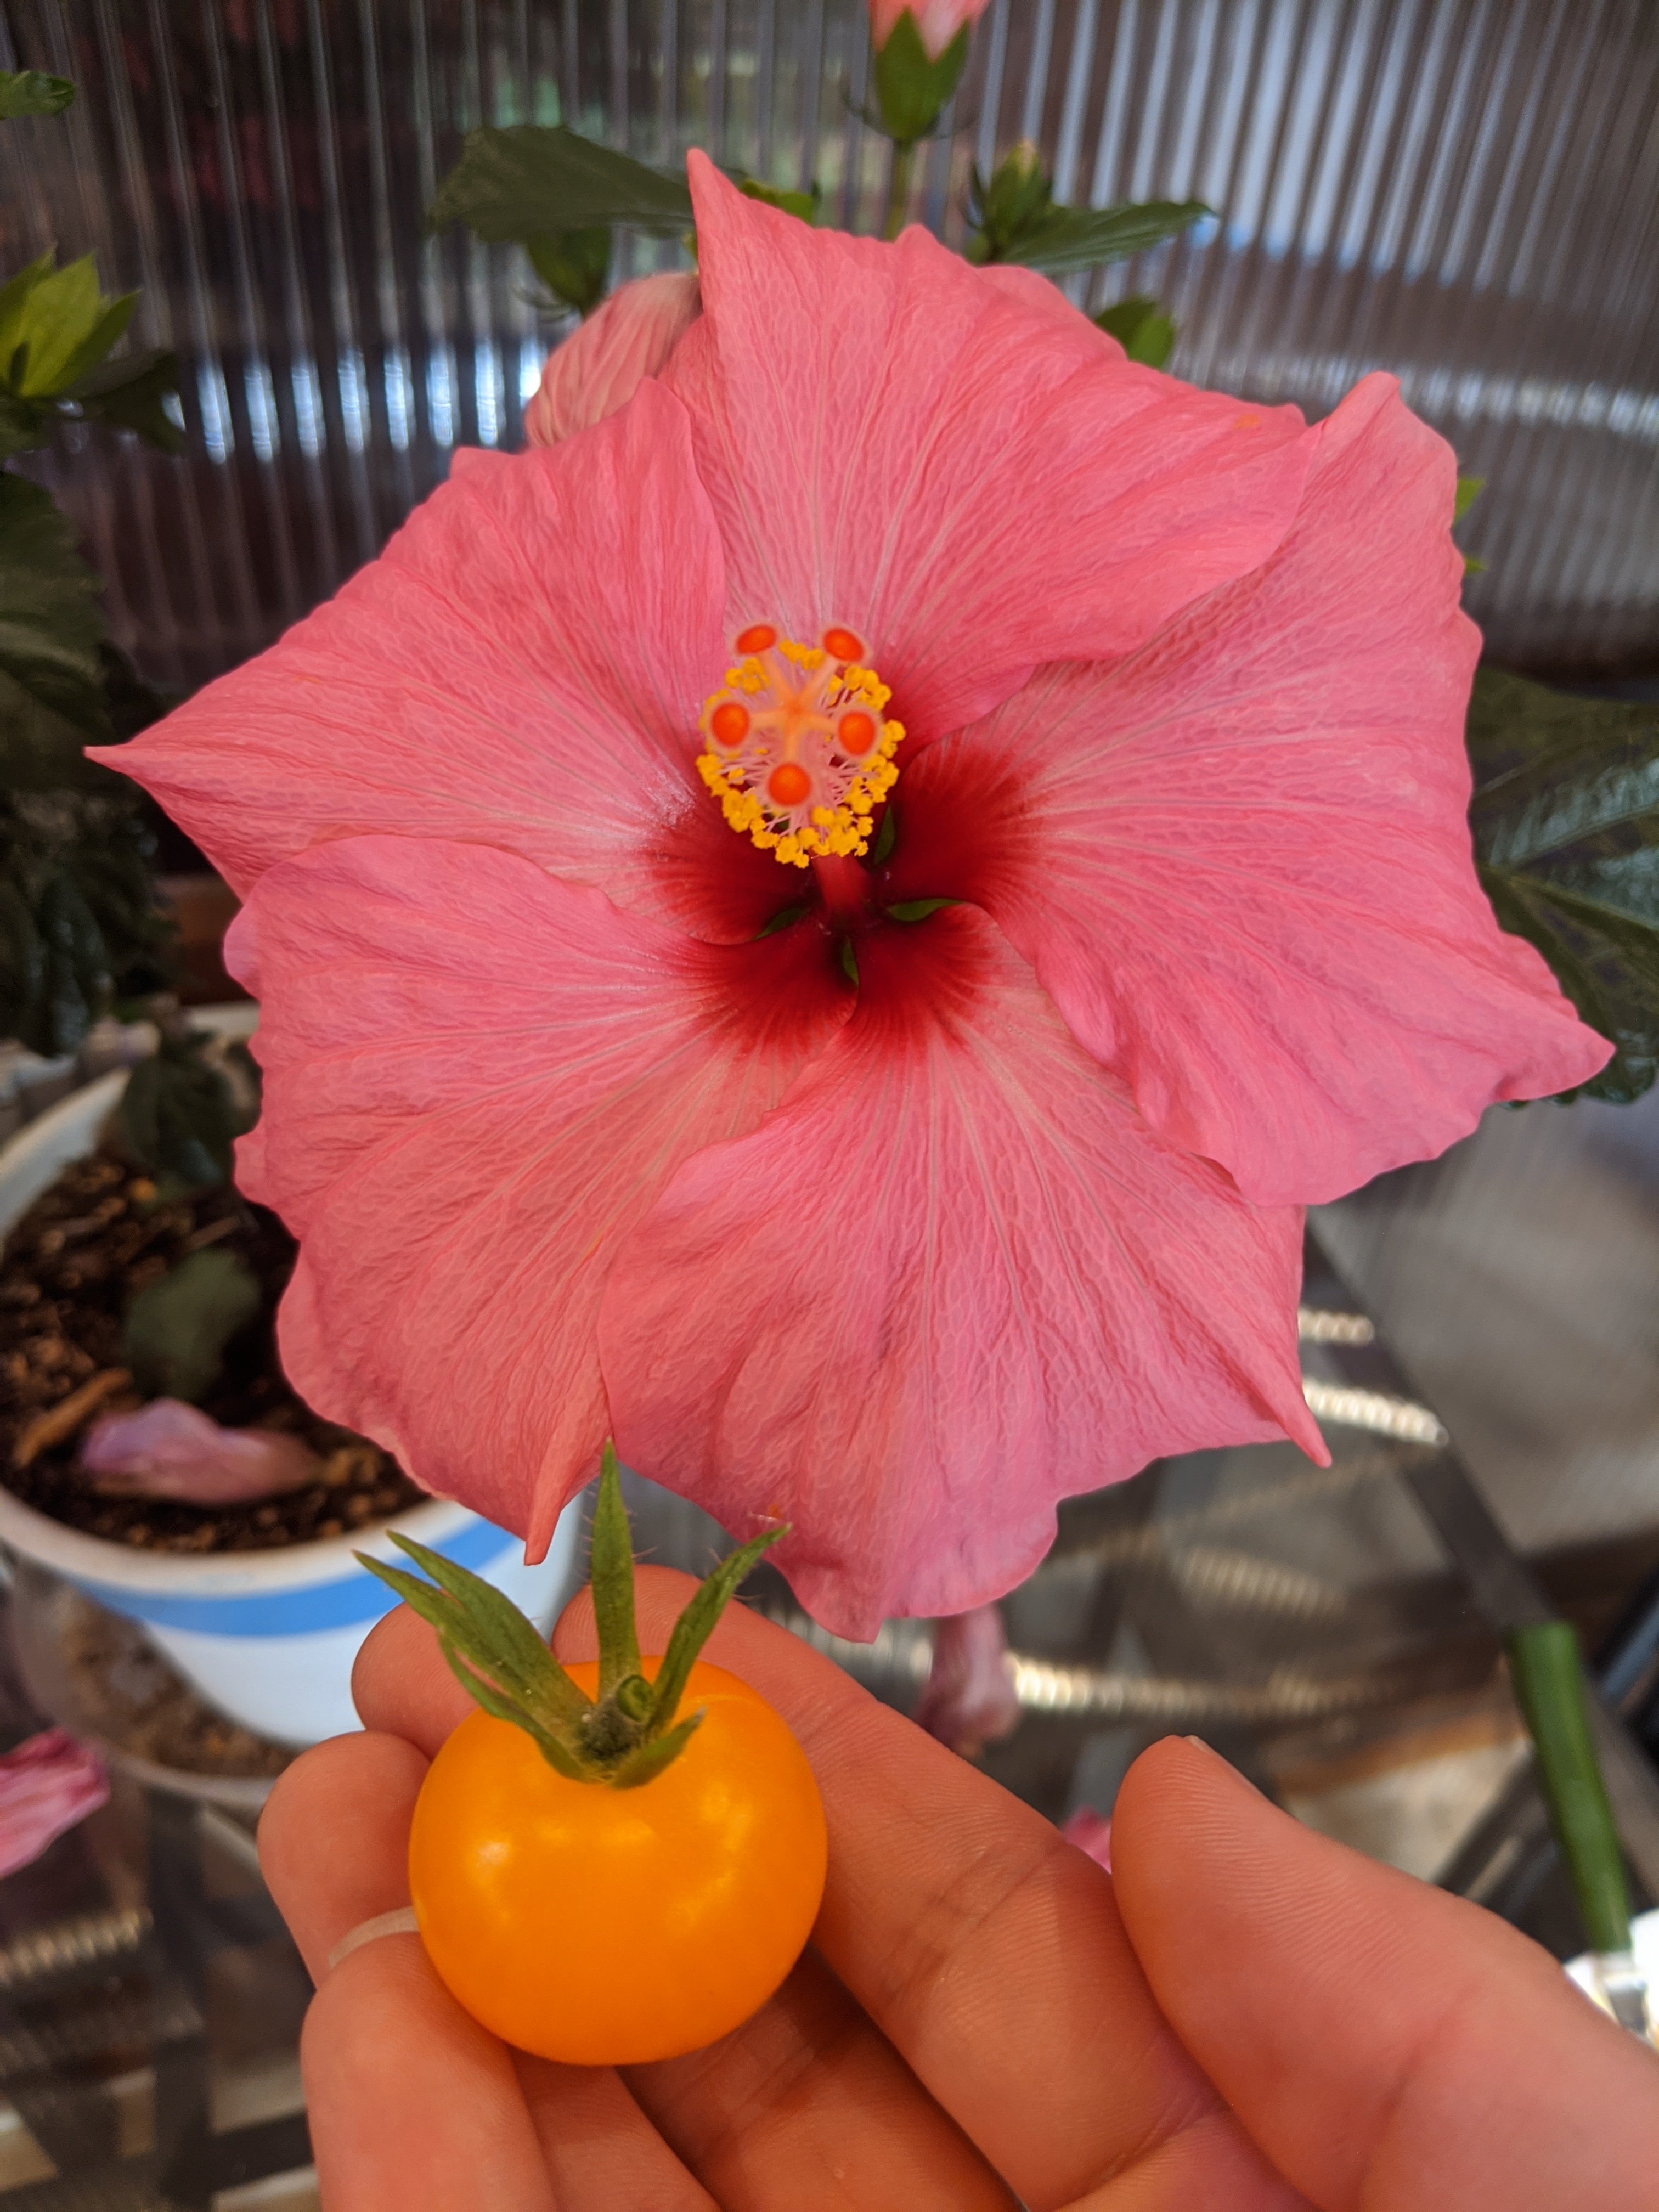
Today I got back from spending New Years in Florida, and was greeted by the first ripe cherry tomato in the greenhouse! I had planted these Patio Choice tomatoes on Sept 28, so clocking in at just over 3 months, it was quite good. I also had a flowering pink Hibiscus as well, which was a very cheery greeting!
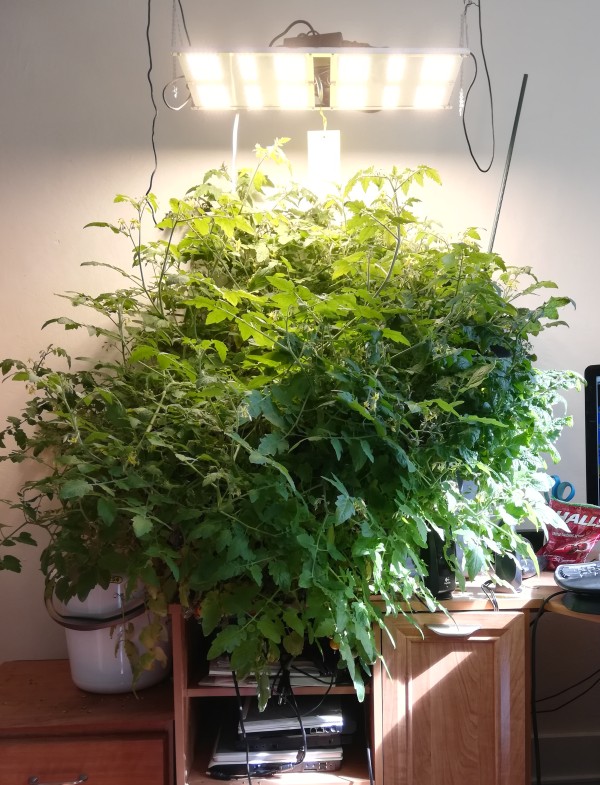
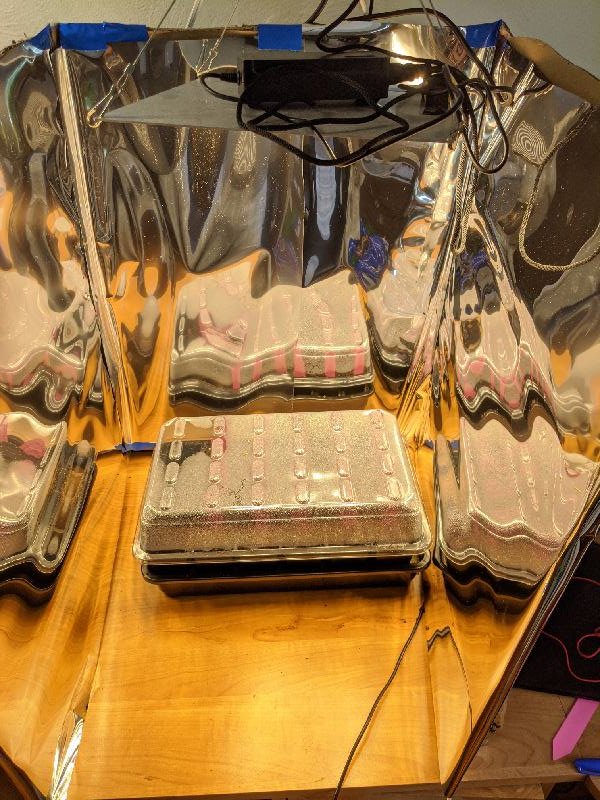
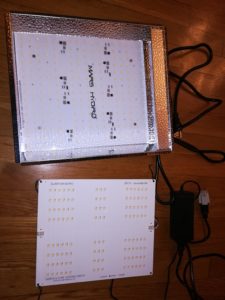
I’ve been dabbling in grow lights for a few years now, starting with CFLs. My first LED light was a Mars Hydro 300W burple light. It made my greenhouse glow with an eerie glow that probably made my whole neighborhood think I was up to no good. Last year I got into HLG’s quantum boards, the build it yourself kind. This year, Mars Hydro’s new TS series of fanless LED boards was looking pretty attractive.
So I picked up a TS600 and for first impressions, it seems pretty nice. It is lightweight, minimal assembly required, has a very nice sun-like color, seems to have a water-resistant coating over the LEDs, and has a lip to focus the light downward instead of just being a flat board. The driver is built in too. The HLG panels are quite nice too and are better suited for smaller plants where you want a light per plant (you can run 3 HLG panels for 210 W whereas the Mars Hydro you can only run 2 panels for 200 W). The power supplies I’ve been using with the HLGs do tend to die (I’ve replaced 2 out of 8 in the past year), so I’m hoping Mars Hydro is more reliable (my older burple light is still going strong). I have only just gotten the Mars Hydro light though, so haven’t done very much testing at all, but it’s looking promising.
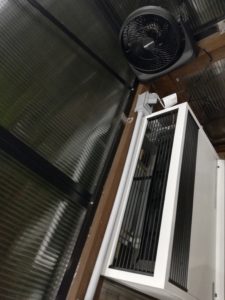
Basic fan to provide air circulation and distribute the heat better.
The new fan for my heater came today from Amazon, it seems to be working pretty well to circulate the heat better. It’s just a cheap, basic fan but seems to do the trick.
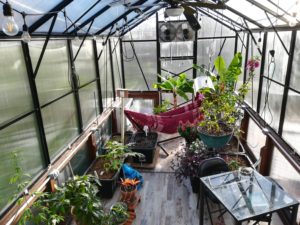
For the past few winters, I’ve put a hammock in the greenhouse, which has been delightful. This year I was thinking about a hammock chair to save space, but it looks like I don’t yet have the greenhouse filled up to the point where I need to part with the hammock. So today I put up the hammock and enjoyed the sun. I tweaked the heating some so the fans come on at 83 F and added another automatic top vent opener.
This morning was the first freeze here in Pittsburgh. It toasted my tomatoes and the remainder of my warm weather crops. The greenhouse did great though, a nice 70 F throughout the night.
The past few days I’ve been seeing 10-15 degree swings with an analog house thermometer and a digital house thermometer hooked up to my gas Williams vented heater in my greenhouse. This seemed pretty large. Part of the problem seems to be the thermostats don’t adjust quickly to temperature changes, e.g. are too low-pass. Could I somehow hook up something that responded more quickly to temperature swings?
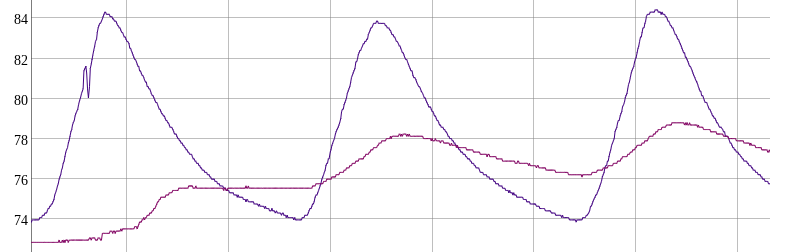
So time to experiment! I did have a heat mat thermostat controller that turns a 120 V electrical plug on and off (designed to warm soil to a set temperature for germination). It has an external thermostat probe that seemed quite responsive. However, the gas furnace doesn’t turn on and off with 120 V, it’s instead a millivolt system that simply closes and opens a circuit to turn the furnace on and off. So I got an AC/DC power relay that converted a 120V electrical socket turning and off to turning my furnace on and off.
This seems to be working a lot better! Less than 5 degrees of temperature swing. This is a pretty simple thermostat so the next step is to try a programmable thermostat that has an external probe. Having it set a lower temperature at night automatically would be quite nice.
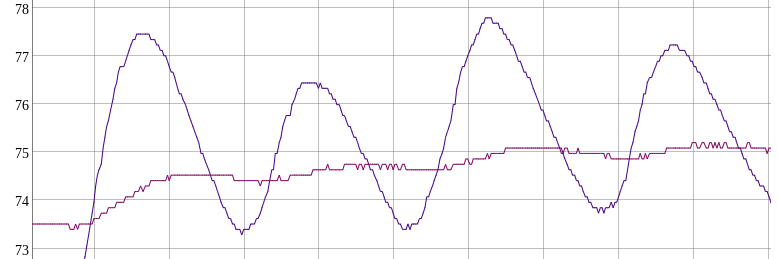
I got my new gas heater installed and it works with an external thermostat (instead of my ventless gas heater which has an internal thermostat and a knob at the top that you can make it warmer or cooler). This is cool except I’m finding out that most thermostats have a lowpass filter and only expect the temperature to fluctuate so quickly and no more. I first tried a Honeywell bi-metal completely mechanical thermostat (CT50K1028) which when I set it, has 10 degree swings:
Honeywell mechanical thermostat suffers from 10 degree swings (ignore light purple, that’s an adjacent room).
I then tried a programable thermostat, the White Rogers 1F81-261 which came as our main house thermostat and we subsequently replaced with a wi-fi thermostat. I was hopeful a digital thermostat would have a much better response time, but when I set it to 70 F, the greenhouse hit 85 F before the thermostat registered 70 F and kicked off! That’s pretty bad! I read the manual and it doesn’t seem like there is a way to adjust that aside from setting a fast cycle and slow cycle (but I was already on the fast cycle).
I then found that I could adjust the thermostat anticipator on Honeywell mechanical thermostat and set it to the shortest setting and still saw a 10 degree swing, so that’s disappointing. While I expect this problem to become less as winter approaches because it will take longer and longer to reach the desired temperature as it gets colder and colder, I will have to continue to investigate to see if there are some better ways.
Today I spent some time spraying all the plants I’m hoping to transfer into the greenhouse with horticultural oil in an attempt to minimize the number of pests I bring into the greenhouse. My mango has pretty bad scale and a couple of weeks ago I spent an hour using the hose to blast off the existing scale and then sprayed it with Neem. I’m seeing some more scale, so hopefully horticultural oil will help do the trick.
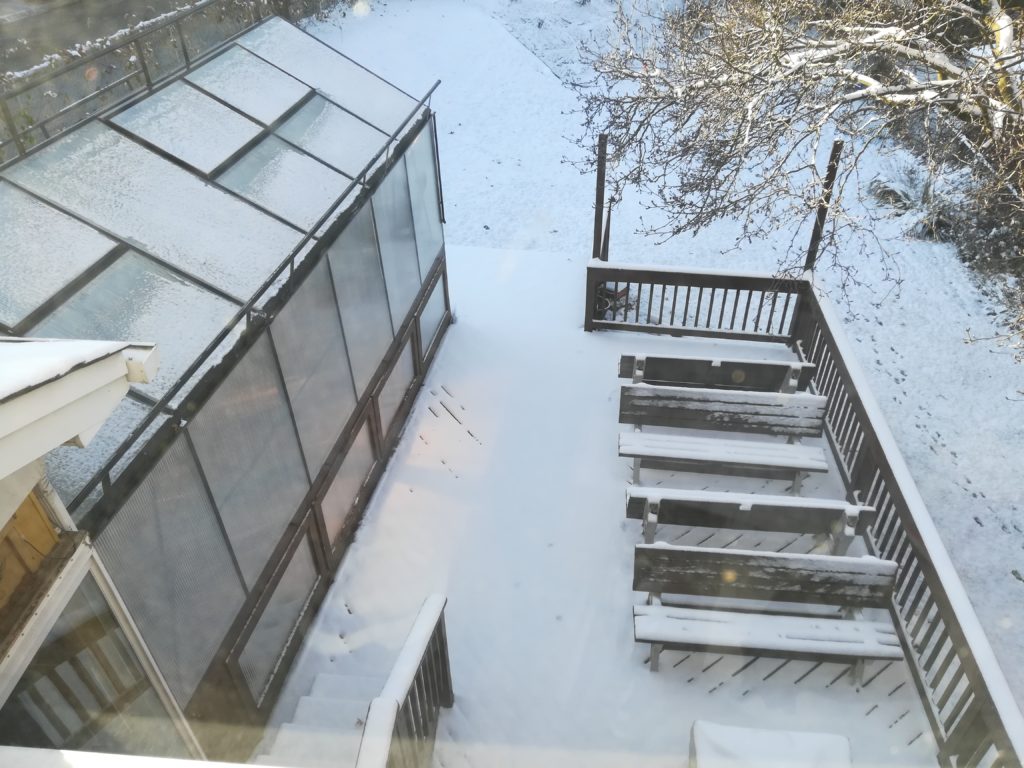
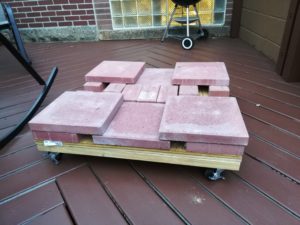
In non-greenhouse news, after re-staining the deck, we wanted to move the firepit back onto the deck. We had it on some bricks and patio stones to prevent the wood deck from getting too hot, which made it hard to relocate the fire pit if we wanted more deck space for say a party. So I used two 1/2″ plywood panels stacked ontop of each other and some 2x4s to construct a movable base on wheels. This should let us scoot the firepit around on the deck if we have a large party and need the space. It moves around nicely, but we will see if it works with the fire!
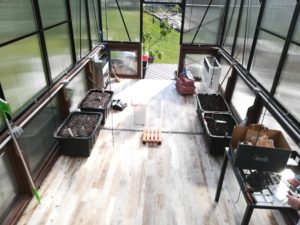
So with the traveling I’ve been doing lately, I haven’t had had a chance to really get a jump-start on the fall greenhouse. I really hoping to start a month ago in late August, but better late than never? Today I spent a bunch of time sweeping, cleaning, setting up some of the sub-irrigated bins I grow in. A bunch of the bins had dried out, so I re-wetted them and fluffed up the soil.
I mainly planted green beans (Rattlesnake, Blue Kentucky, and Dwarf Velour) and tomatoes (Patio Choice seeds and a cutting from my Better Boy), but also planted some basil, green onions, and peppers too. I’ll be planting more and bringing in plants from the outside, but this week it’s supposed to be up in the high 80s so not quiet yet!